Assembly & Tests
All components are listed here: Standard Parts, Special- & Small Parts
Prepare box
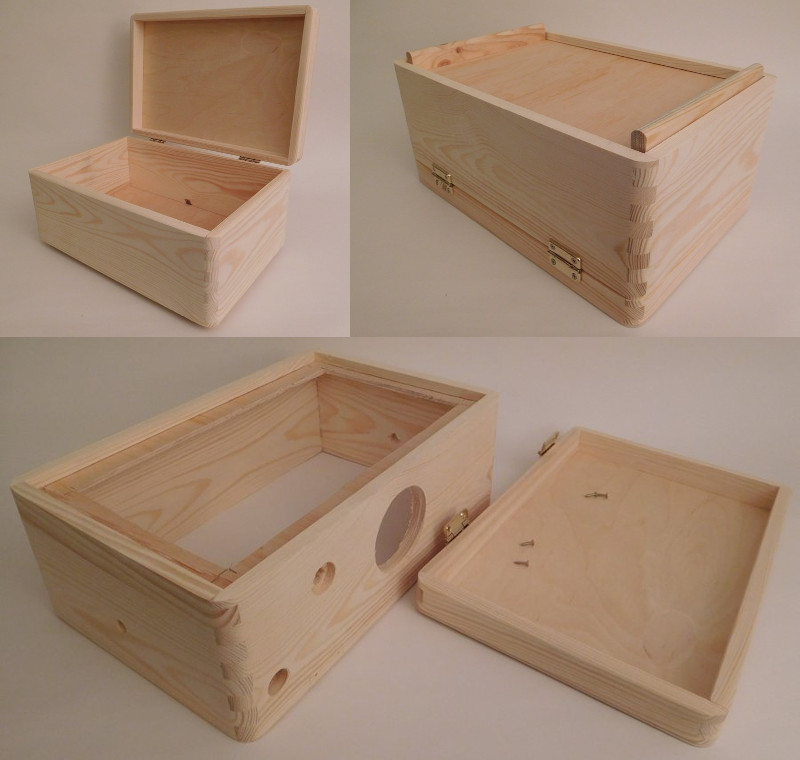
- Unscrew cover with hinges.
- Remove the two skirting boards by carefully bending them back and forth with pliers. Make sure that the side walls are not damaged in the process.
- Insert drill holes
- for the loudspeaker: in the middle of the rear wall
- for the volume potentiometer: at the height of the alarm rotary switch
- for (USB) cable entry
- for the two striking nuts: centered on the side walls
- Rework the hole for the volume potentiometer with a flat countersink, taking into account the thread length of the potentiometer.
- Insert impact nuts.
- Cut out the wooden floor; leave 10 mm on the left edge (front view); 20 mm on the other edges; also here take care not to damage the side walls.
Prepare lower front panel and connect to housing
- Drill eight holes for M4 countersunk screws in front panel and bottom of housing.
- Make sure that they lie approximately in the middle of the 20 mm edge of the bottom.
- Screw front panel.
- The rotary switches and potentiometers have a "nose" to prevent their housing from turning. Finish the lower front panel accordingly.
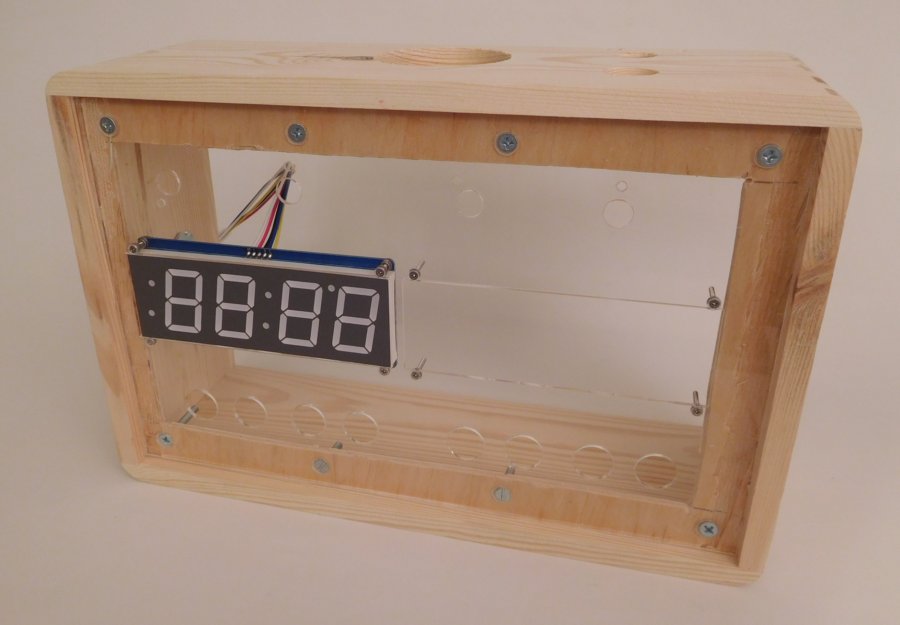
Prepare and install display elements
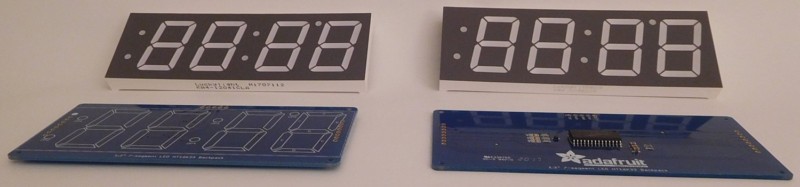
- Carefully drill the mounting holes of the backpack to Ø 2.5 mm.
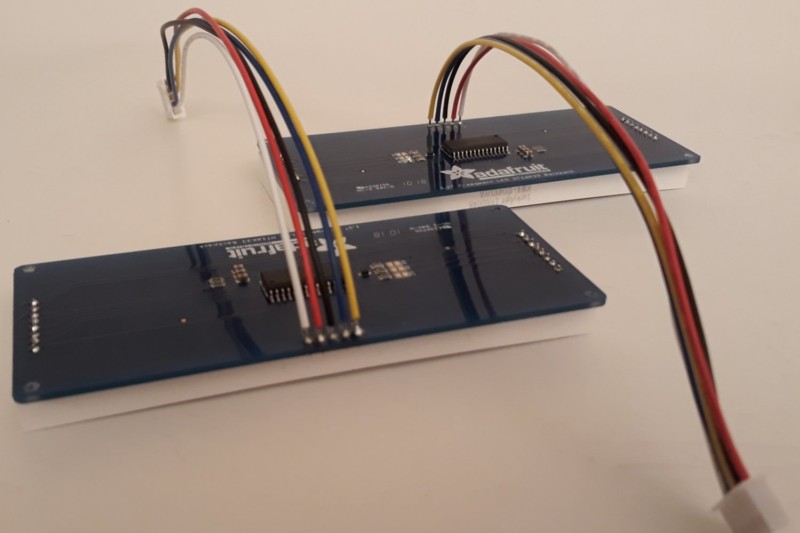
- Solder the displays into the backpack.
- Solder in the 5-pin connecting cables.
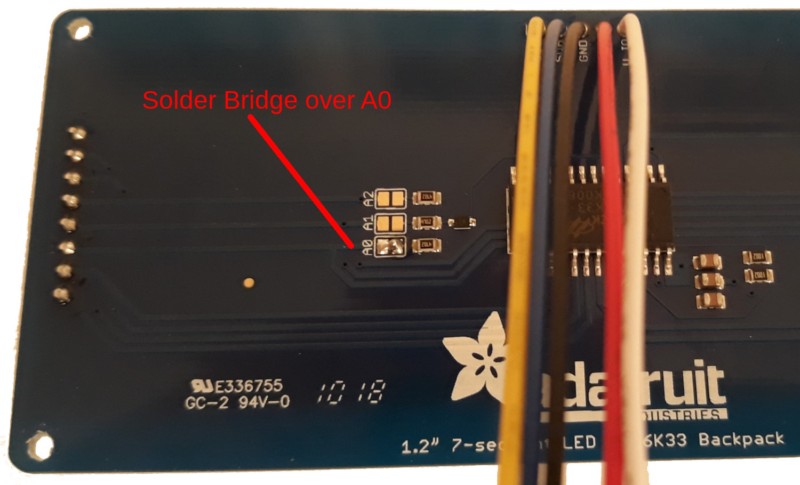
- Solder the yellow display with a "A0" solder bridge so that it gets the I2C address 0x71.
- Drill mounting holes in the lower front panel for the M2 countersunk screws.
- Connect displays to the front panel, making sure that the surface of the displays is flush with the surface of the lower front panel.
Prepare RTC module
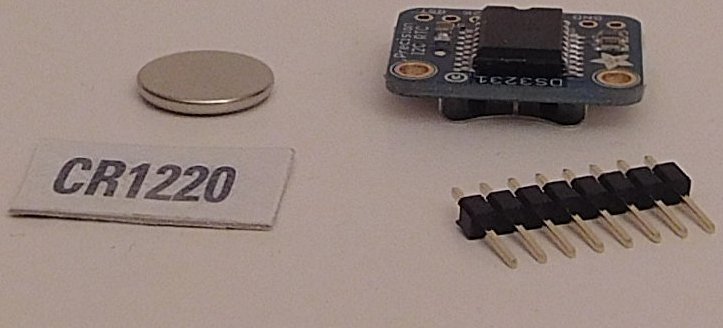
- Solder on pin header and insert button cell.
Prepare DFPlayer module and SD card

- Rename any MP3 file (song or sound to wake you up with) so that it starts with "0001-" and ends with ".mp3" (e.g. "0001-my-song.mp3") and copy it to the root directory of an FAT32 formatted SD card.
- Plug the card into the slot of the DFPlayer.
Prepare the FRAM module
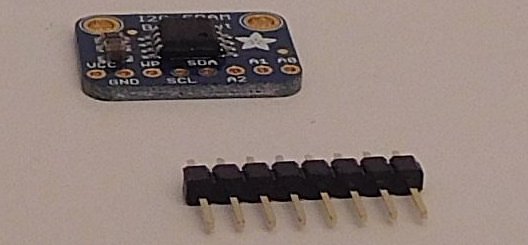
- Solder on the pin header.
Prepare the control elements
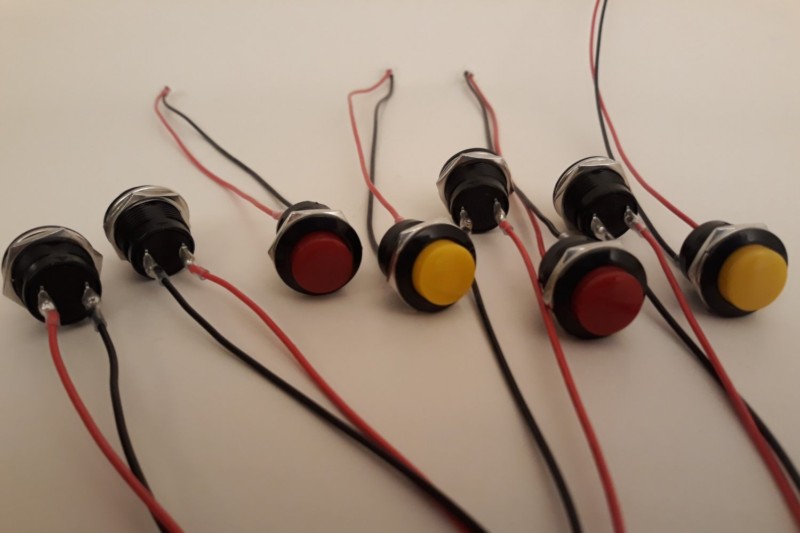
- Solder 2-pole connecting cables to the 8 push-buttons.
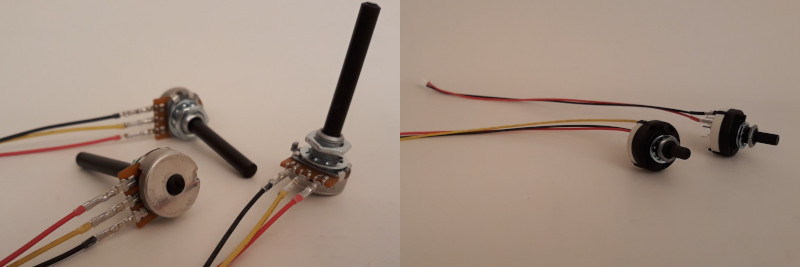
- Solder 3-pole connecting cables to the 3 rotary potentiometers. Assignment see photo.
- Shorten the actuating shafts of the potentiometers until the knobs fit on them at a suitable distance from the front panel or the wooden wall of the speaker.
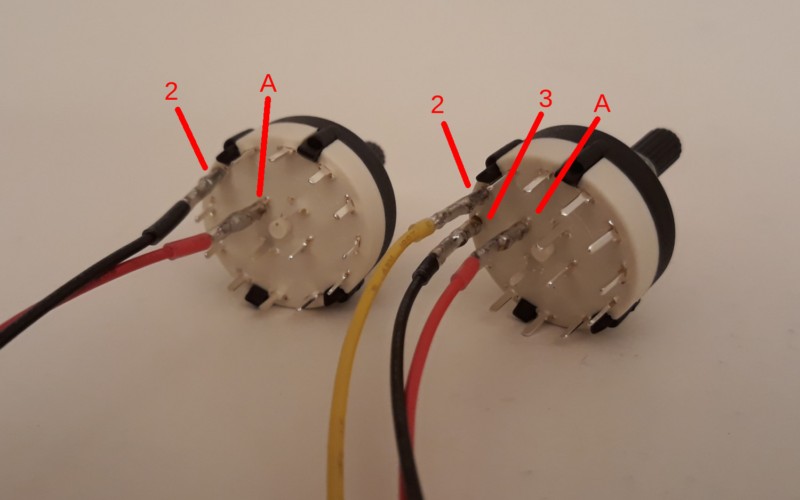
- Solder a 2-pole connecting cable to one of the two rotary switches. Solder one 3-pole connecting cable to the other rotary switch. Assignment see photo.
Tip 1
The connecting cables can be soldered directly, but with switches and potentiometers it is easier to connect crimp sockets to the cables first, plug them onto the pins and then solder them.
Tip 2
In order to protect the connection electrically and to make it mechanically more robust you can use shrink tubing (here in the pictures: transparent).
Install speaker and volume control
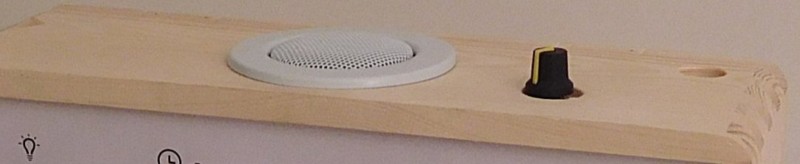
- Insert loudspeaker, attach volume potentiometer and attach rotary knob.
Prepare insert sheet
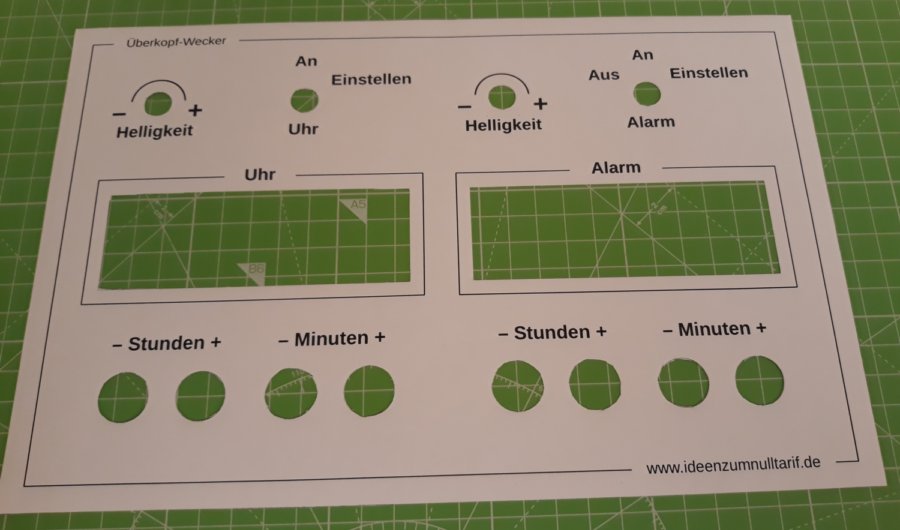
- Print the insert sheet on the thickest possible paper and cut off the edges.
- Cut out the rectangles for the displays and the holes for the switches, potentiometers and buttons with a sharp knife. Best on a cutting mat.
Mount upper front panel and install operating elements
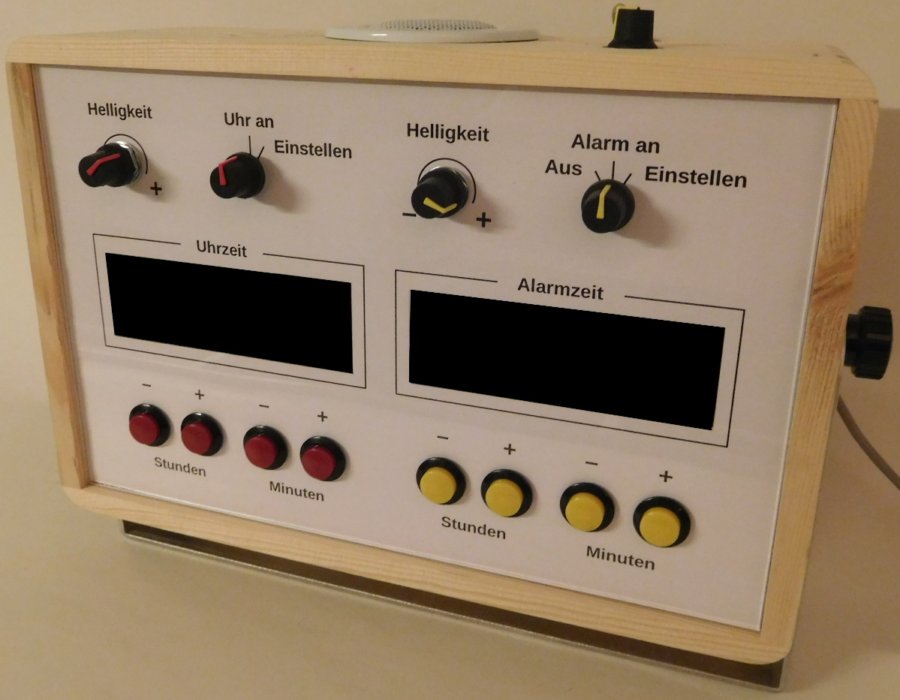
- Insert tinted foil to cover the displays together with the insert sheet.
- Insert front panel.
- Cut the holes for switches, potentiometers and buttons in the tinted foil.
- Limit the clock switch to two switching positions using the setting ring.
- Insert and screw in switches, potentiometers and buttons.
Prepare, assemble and wire PCB
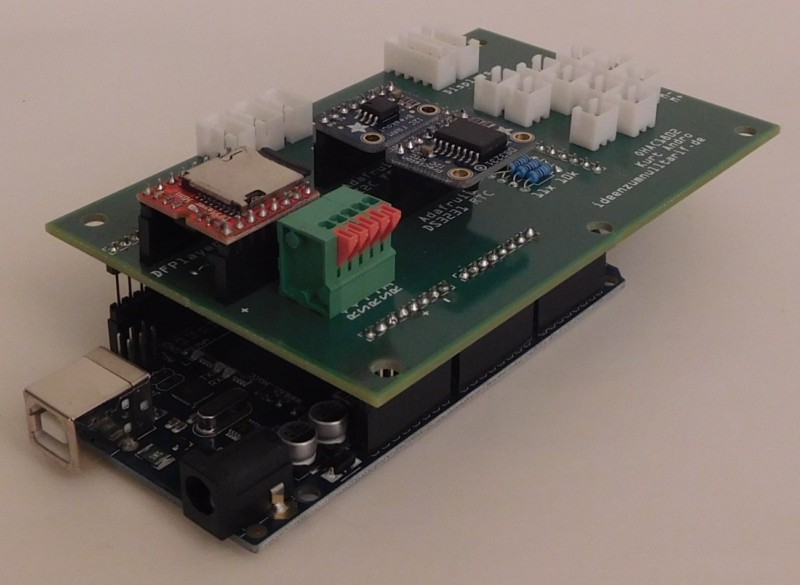
- Solder components in this order
- Resistors
- 2- to 5-pole sockets
- Header bars
- Terminal blocks
- Stacking strips (PCBs previously placed on the Arduino Mega)
- Screw the PCB with spacer sleeves to the front wall of the box (push-button side) so that there is still enough space on the right for the small relay PCB
- Insert DFPlayer, FRAM and RTC DS3231
- Connect according to the PCB labeling or connection diagram (see Wiring)
- 2- and 3-pole connectors of switches and push-buttons
- 3-pole plugs of the potentiometers
- 5-pole connectors of the displays
Install relay PCB and connect

- Screw the relay PCB to the right of the motherboard to the front panel
- Connect one wire of the speaker to the relay PCB, the other to the terminal block of the motherboard
- Create the remaining connections between the relay PCB and the motherboard (see Wiring)
Plug in the USB cable and secure it
- Pass the USB cable through the rear panel of the housing and connect it to the Arduino
- Attach strain relief to the side wall
Download and install libraries
- Adafruit FRAM I2C Lib
- Adafruit LED Backpack Lib
- Adafruit GFX Lib
- Adafruit RTC Lib
- DFPlayer Lib
- Close the IDE, extract the libraries if necessary, rename them if necessary and copy them to the folder "[Arduinosketchbook]/libraries"
Download and install sketch and parameter set
- Download the latest version of the sketch and parameter set and save it in the Arduino Sketchbook folder
- Connect the USB cable to the PC on which the Arduino IDE is installed
- Open the sketch, select the board type and COM port if necessary and upload the sketch
Test functions
- Check whether
- the brightness of the displays can be adjusted
- you can set the time and the alarm time
- the alarm sound is played
- the volume can be adjusted
- the MP3 file is played completely
- the MP3 file can be interrupted by switching to "Alarm off" or "Set alarm"
- the relay was energized only during playback of the MP3 file
- After IDE termination
- disconnect the USB cable from the PC
- connect it to the Powerbank
- and check if the time and alarm time are preserved after disconnecting the power bank from the power supply and disconnecting the USB cable from the power bank
Change constants
The Arduino program consists of two files
- parameterset4clock1.h (Header)
- ueko-wecker-180325.ino (Sketch)
In "parameterset4clock1.h" you can set some constants with which you can adjust the behaviour of the displays, the DFPlayer and the minute buttons of the alarm time.
- Displays: The constants MIN_C and MAX_C are used to compensate differences in brightness between the displays or to adjust the brightness according to your own preferences. They can be used to set the lowest and highest brightness values for the clock display. Permissible values are 0 to 15. The same applies to MIN_A and MAX_A, which are responsible for the alarm display.
- DFPlayer: MIN_V and MAX_V indicate the lowest and highest volume values. Values between 0 and 30 are allowed. The setting should depend on the type and volume of the MP3 file. The lower value should always be slightly higher than 0, so that the alarm cannot (accidentally) be set silently. The upper value should not exceed the point at which the loudspeaker might start to boom.
- Minute keys of the alarm time: With MIN_STEP_WIDTH you can select the interval with which the minute keys increase or decrease the alarm time. It should be an integer divider of 60, i.e. 1, 2, 3, 4, 5, 6, 10, 12, 15, 20 or 30. Default value is 1. .
Wall mounting
Ideal mounting height: the user should stretch his arms slightly angled upwards in the supine position and lying on his usual cushion. This height is optimal for the underside, the control panel of the alarm clock. Attach the mounting plate to the wall using dowels and screws.
Cable duct, power supply and power bank
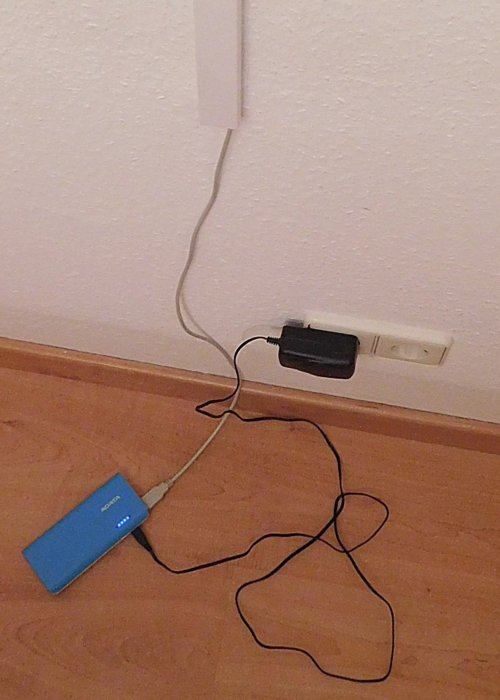
To route the USB cable downwards or sideways, you can optionally use a cable duct (DIY store).
Place power supply unit and Power Bank according to the room conditions and make sure that both remain free of dust and objects (duvets, soft toys, magazines, etc.) that could impede heat dissipation. Otherwise there is fire hazard!